
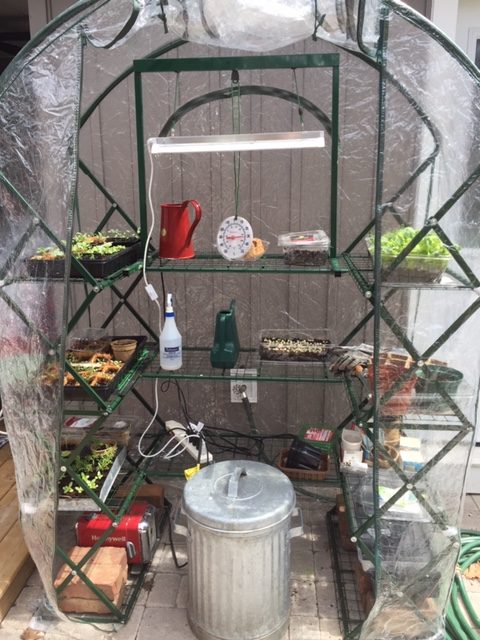
Outdoor poly green house, set up for seedlings.
There are several reasons why you might want to consider starting some seeds indoors for transplanting in your garden later. The most obvious reason is that heat-loving plants such as tomatoes and peppers need a head start in order to ripen before frost. Vegetables such as broccoli, cauliflower and cabbage can be harvested much sooner if they are given a head start. Starting annual flower seeds, provides blooms earlier in the season and allows you to choose the colours and varieties you love.
Starting your own seeds, provides you with the opportunity to choose from a lot more varieties than you will find available as transplants at the nursery in the spring. This is espeially true for tomatoes.
To start seeds indoors there are a few basic requirements:
- Light: To grow seedlings indoors, you need the highest light levels you can manage. That means you need a greenhouse, a sunroom, or south facing windown that receives full sun. If you do not have one of the above, an indoor grow light set up is necessary. Purchase special, full-spectrum grow lights. The light tubes need to be less than 6 inches away from the top leaves of the seedlings. Rig it up so that you can raise it as the seedlings grow. Adequate light will result in seedlings with short, stalky, sturdy stems.
- Temperature: Most vegetable seeds germinate well at 70 – 86 F (21 – 30C). The top of a refrigerator will work. If you do not have a warm place for germination, invest in heat mats to place under your seed trays. Bottom heat is only needed for germination so you can cycle your germinating seeds through one blanket.
- Moisture: The soil must be moist, but not wet. People tend to err on the side of overwatering which can lead to dampening off of the seedlings and thus loss of seedlings. So water sparingly. Once the seedlings are a couple of inches tall, they take more water and need to be checked daily.
- Containers: You can use any kind of clean container for seedlings: egg cartons, milk cartons, cottage cheese containers, fast food clam shells, etc. Just be sure there are holes punched in the bottom for drainage. You can also use seedling trays. They are relatively inexpensive and can be used for many seasons. Ones with individual cells are a good choice as there is minimal disturbance of the roots when transplanted. If you are resusing pots or seedling trays, clean them well. Soaking them in a solution of 10 parts water to 1 part hydrogen peroxide for 15 minutes gives good results.
- Soil mixes: Purchase good quality soil mix made specially for starting seedlings. Regular potting mix does not have nutrients included. If you decide to use potting soil, you will have to add regular applications of liquid ferilizer as soon as the seedling has 2 leaves.
Steps For Starting Seeds Indoors
- Fill the containers with seed starter, lightly press it down and soak the soil mix well
- Sow the seeds, covering them with another thin layer of soil or vermiculite. 2 to 3 seeds in each cell is a good number.
- Set the tray on a heat source. Do not cover the containers and water from below.
- As soon as any seedlings show above the surface, move the tray to high intensity light and cooler temperatures.
- When seedlings are about 1 inch high, choose the best one and pull out or clip off the others.
- Grow on the seedlings. If possible put them into a greenhouse or coldframe and bring them in at night.
- If seedlings get too big for the pot and it is still too cold to put them in the ground, pot them on to keep them growing.
Resoure: Gilkeson, Linda. Back Yard Bounty: The Complete Guide to Year-Round Organic Gardening in the Pacific Northwest. New Society Publishers, 2011.